Installing Domain Controller Server for Lync 2013 Server
The first and the foremost step while installing Lync 2010/Lync 2013 or Skype for Business 2015 is to create/install a Domain Controller server in your network. The steps below will teach “How to setup a domain controller server” and “How to join computers/servers with the domain controller in your network”.
Here are the steps:
Setting up Domain Controller Server:
- Go to your Server Manager
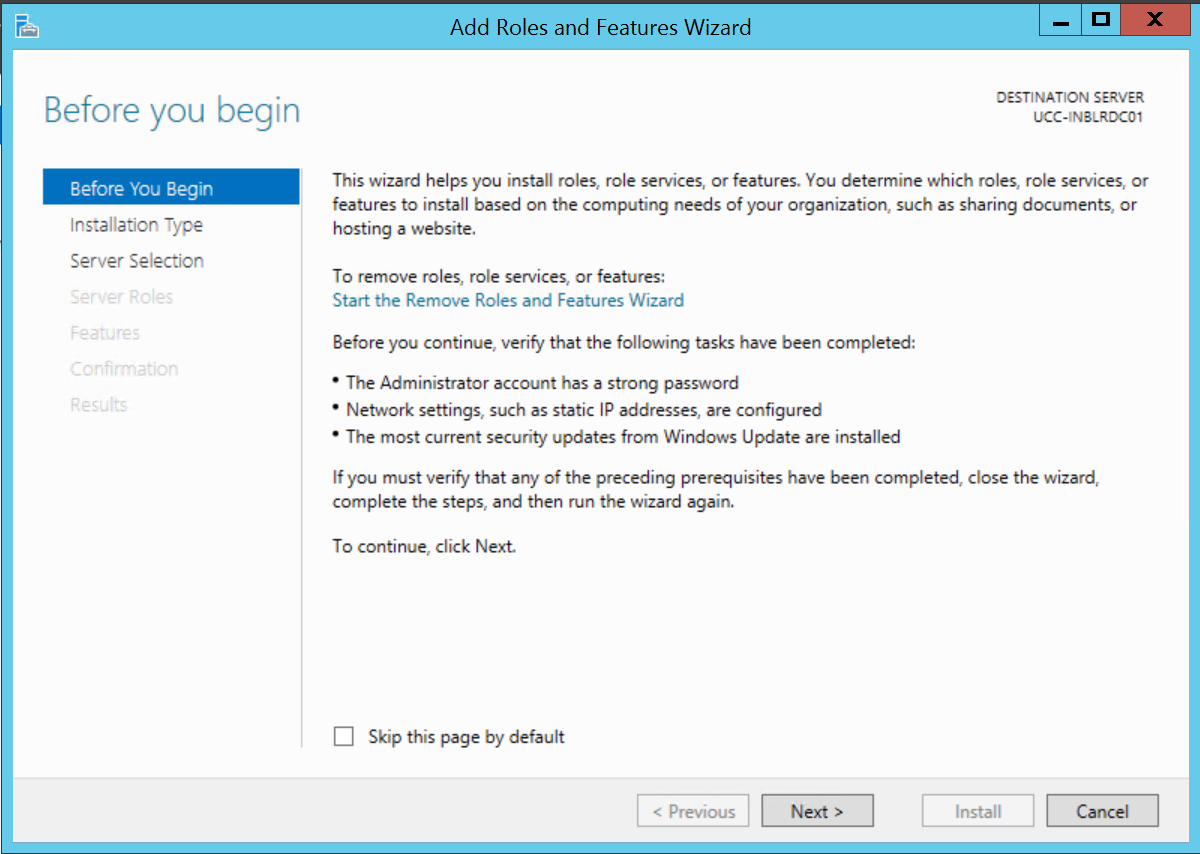
- Click on Add Roles and Features
- Click on Next
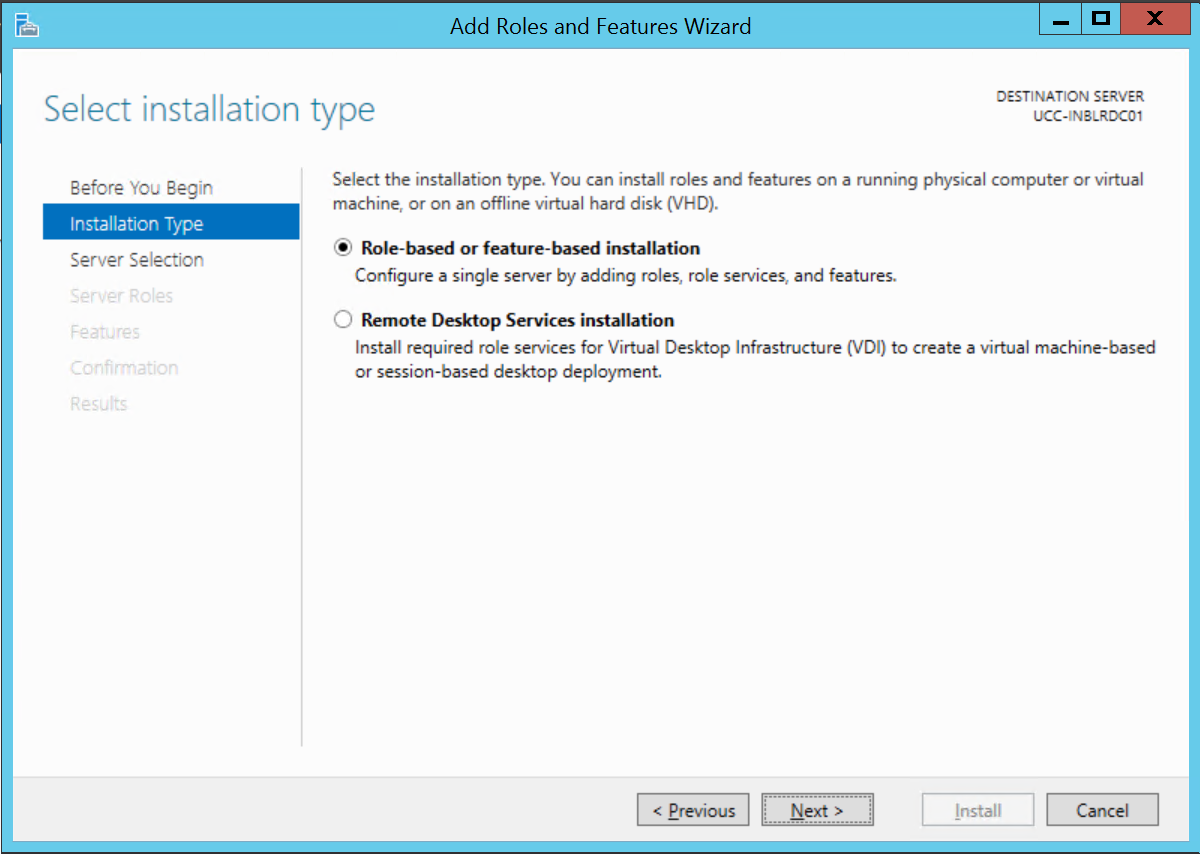
- Radio check “Role-based or feature-based installation” and click on Next

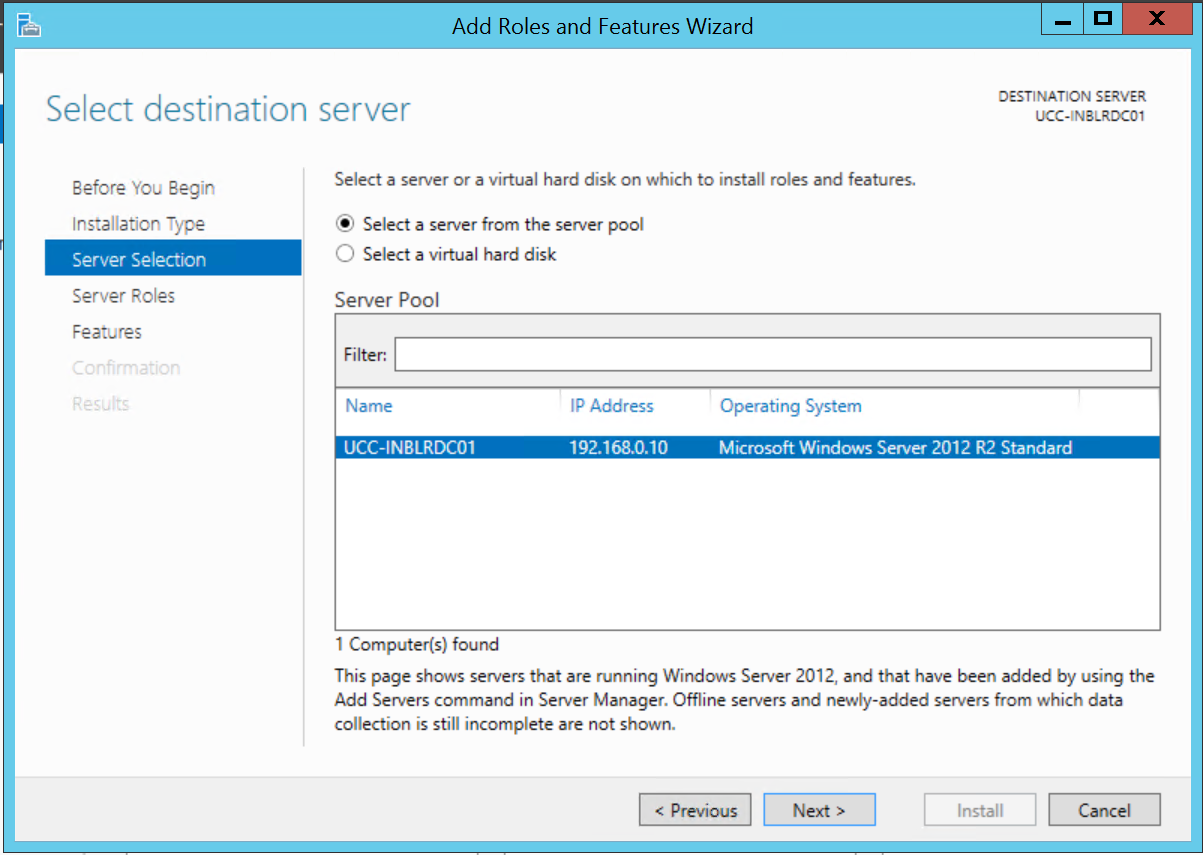
- Radio Check “Select a server from the server pool” and click on Next.

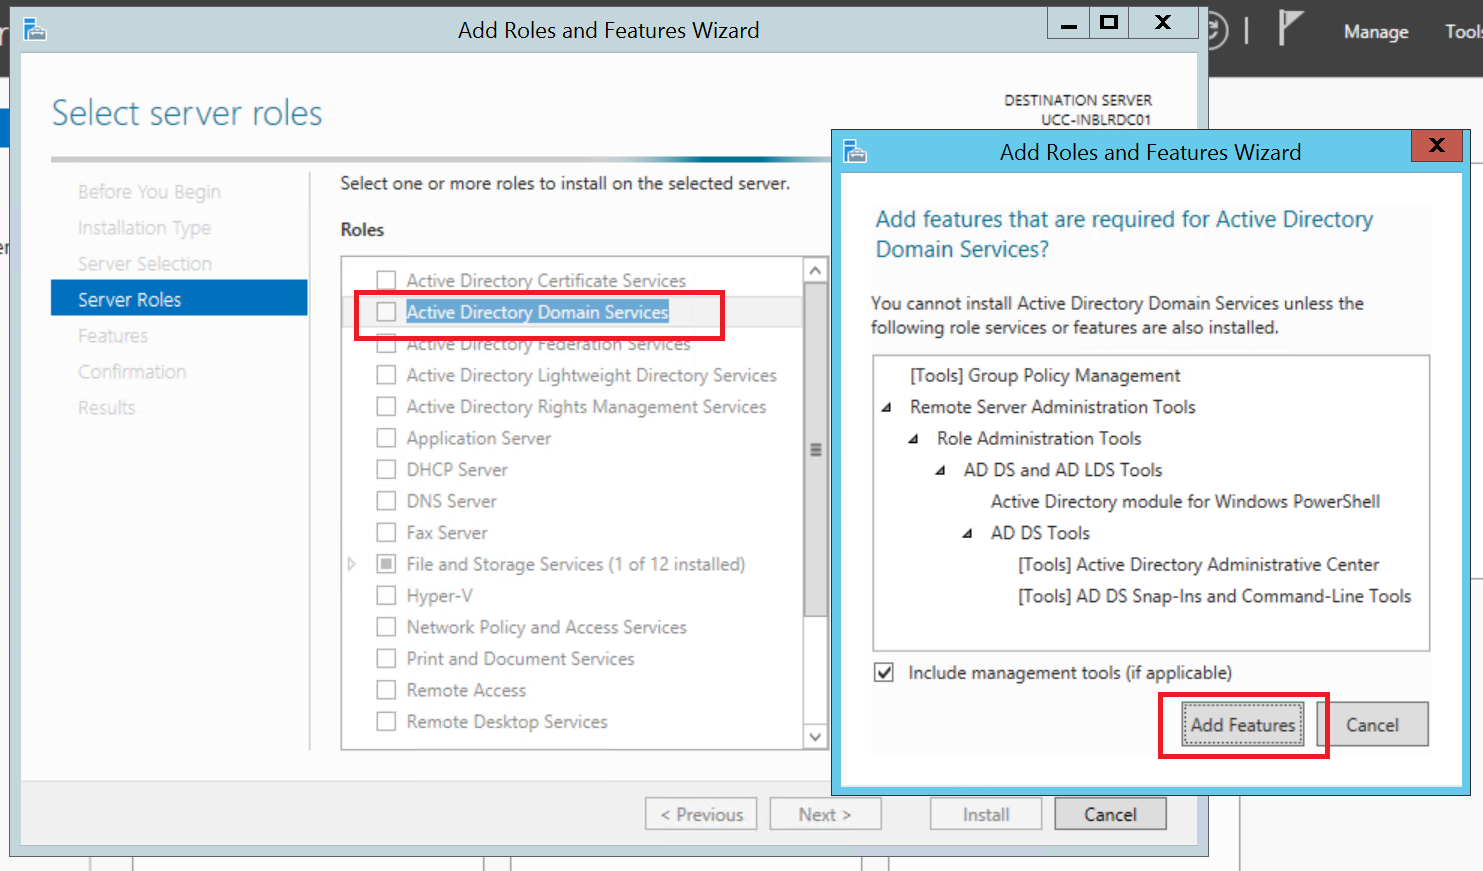
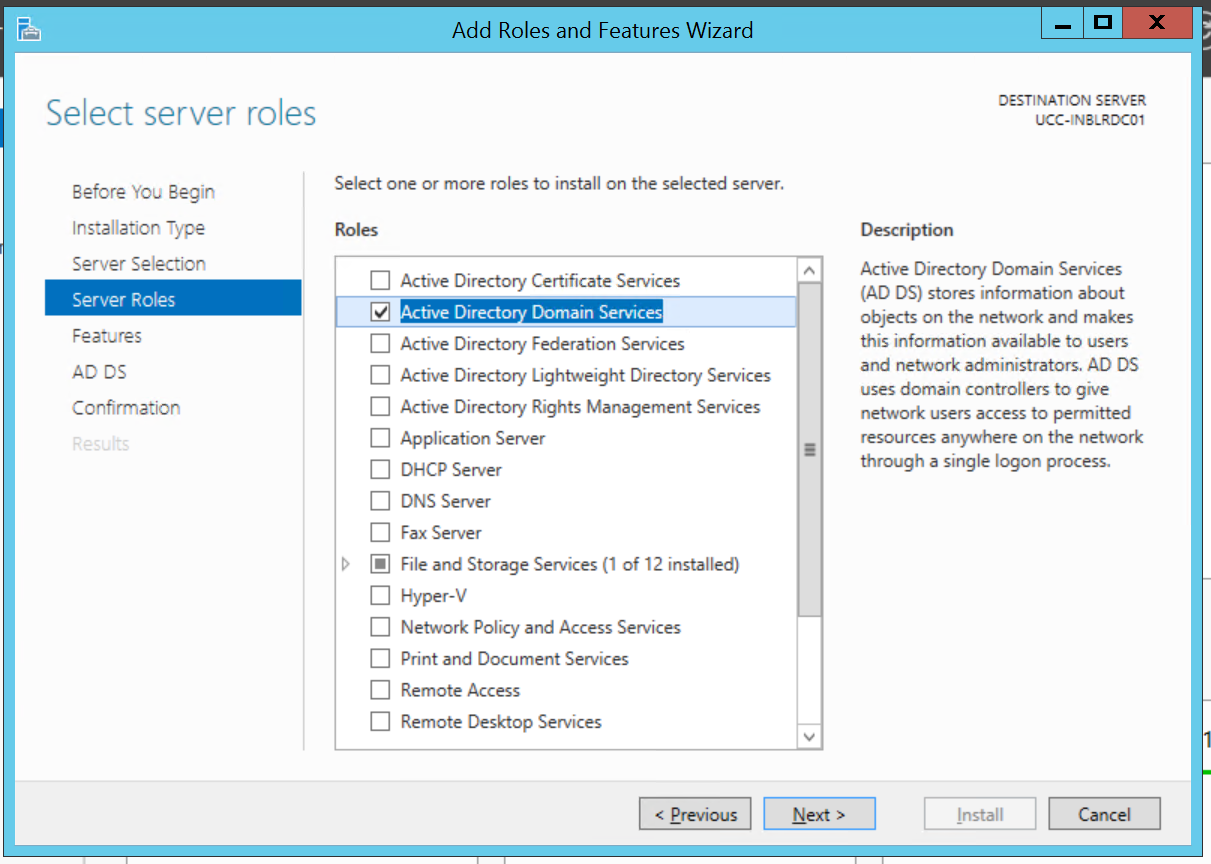
- Check Box “Active Directory Domain Services” and click on “Add Features”.

- Click on Next

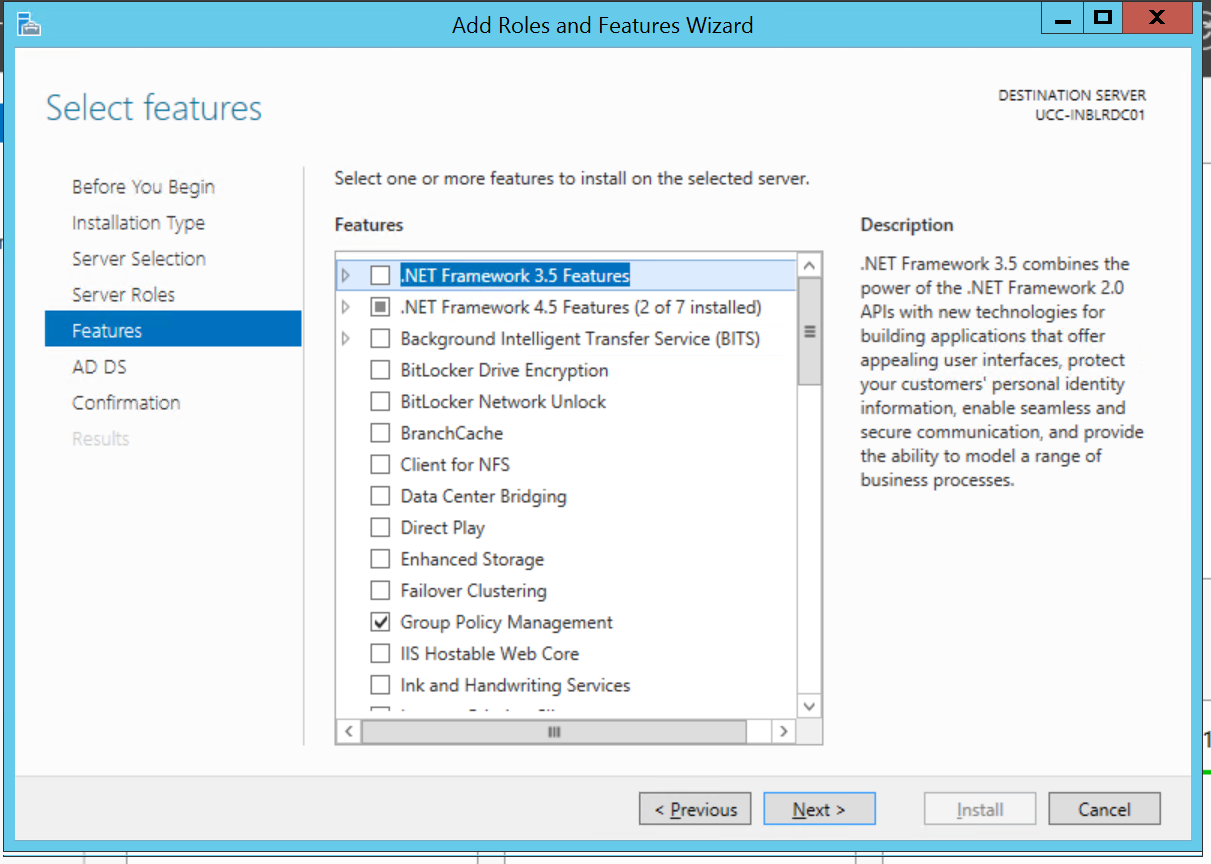
- Click on Next again

- Click on Next
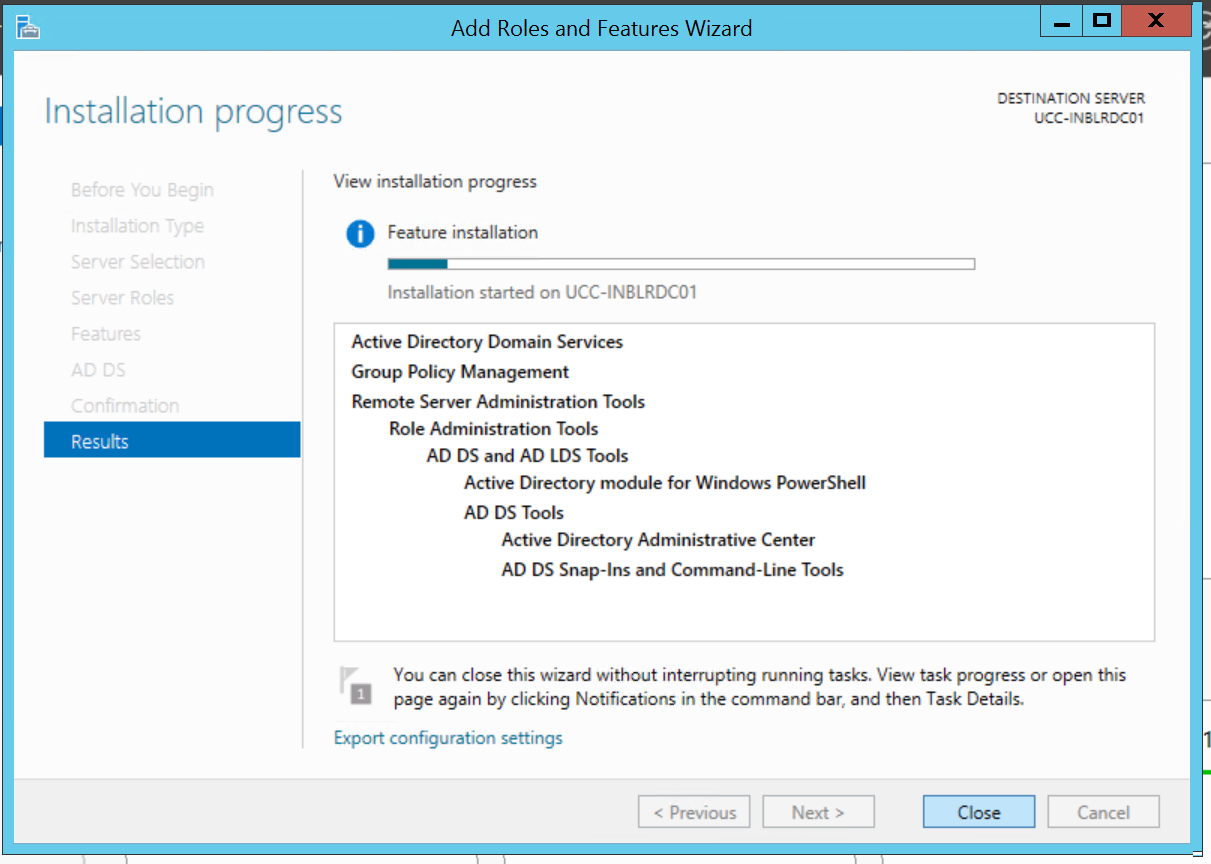
- Click on Install

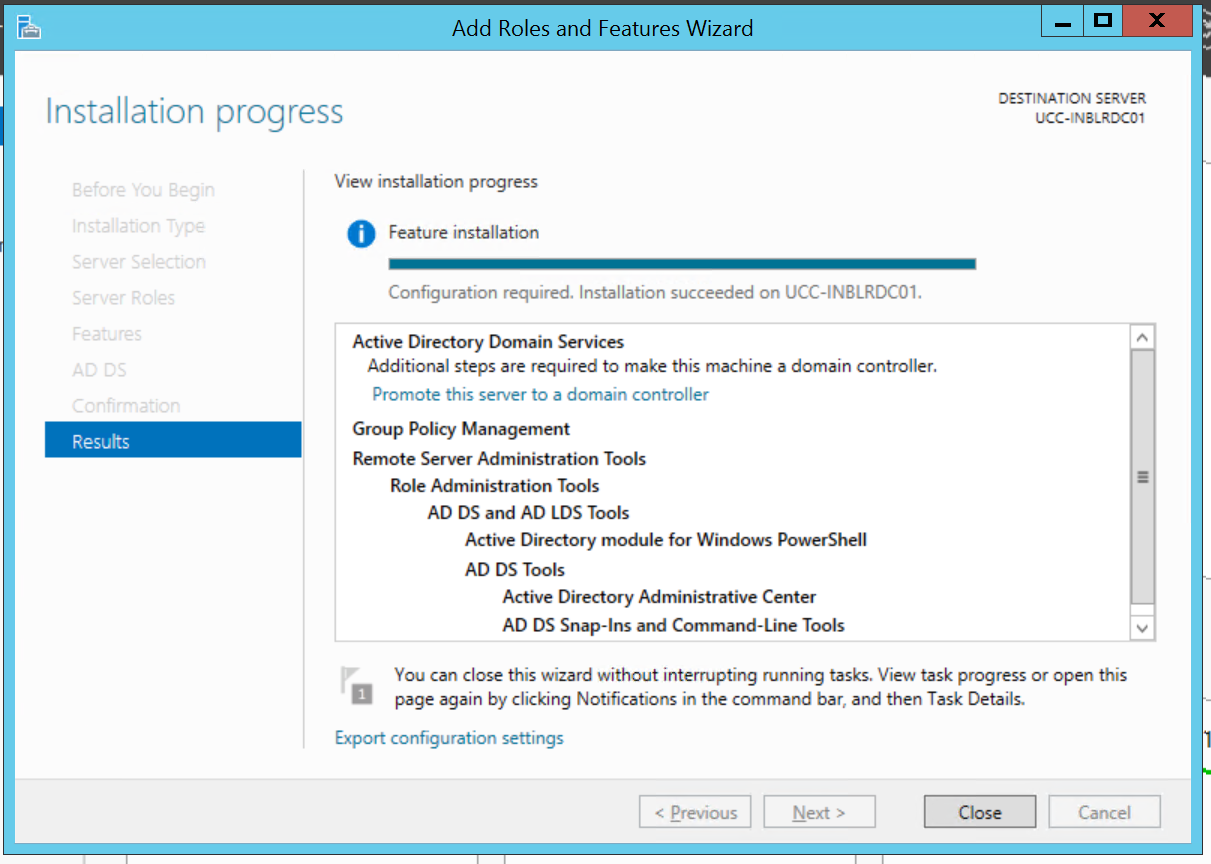
- Once the installation is finished, click on close

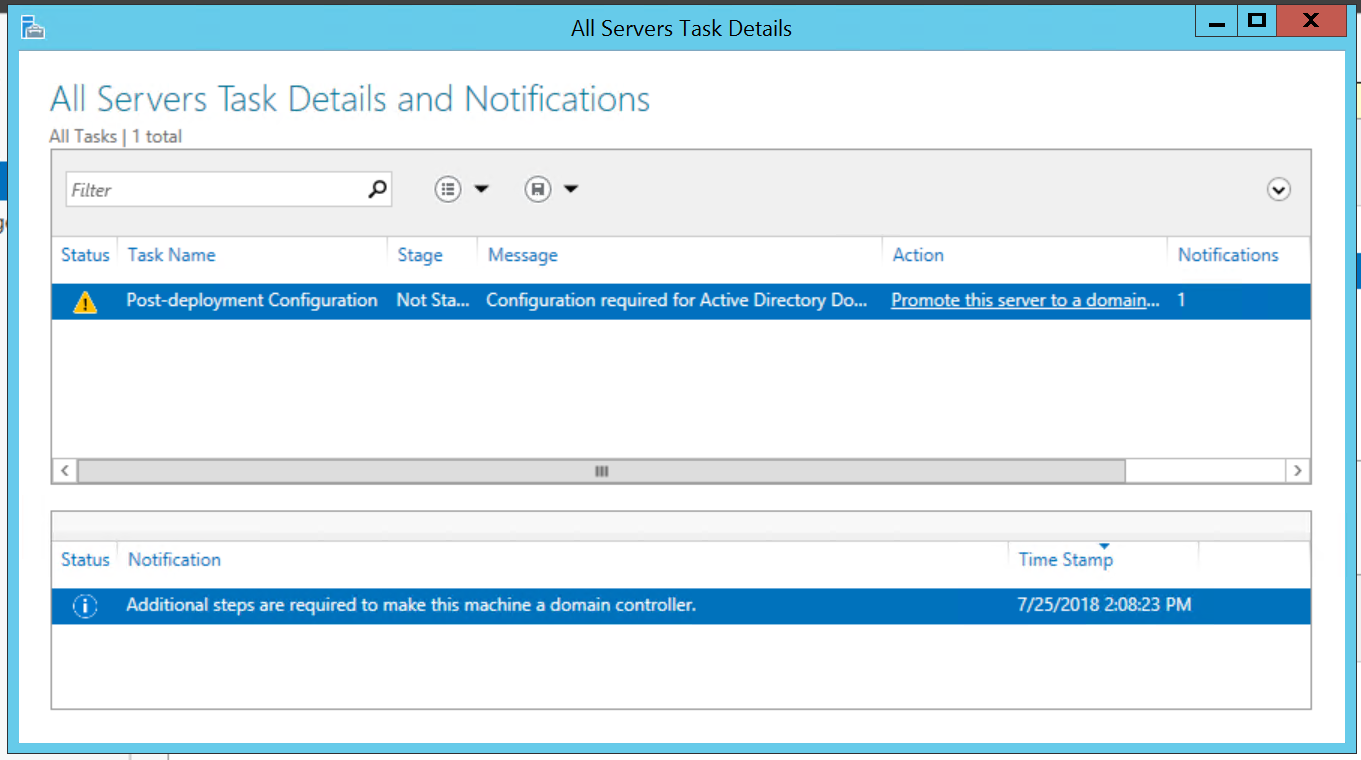
- Now we need to start configuring the Domain. Open Server Manager window and click on “AD DS” under dashboard.
- On the Right hand side of the window, click on “More…”

- Click on “Promote this server to a domain…”

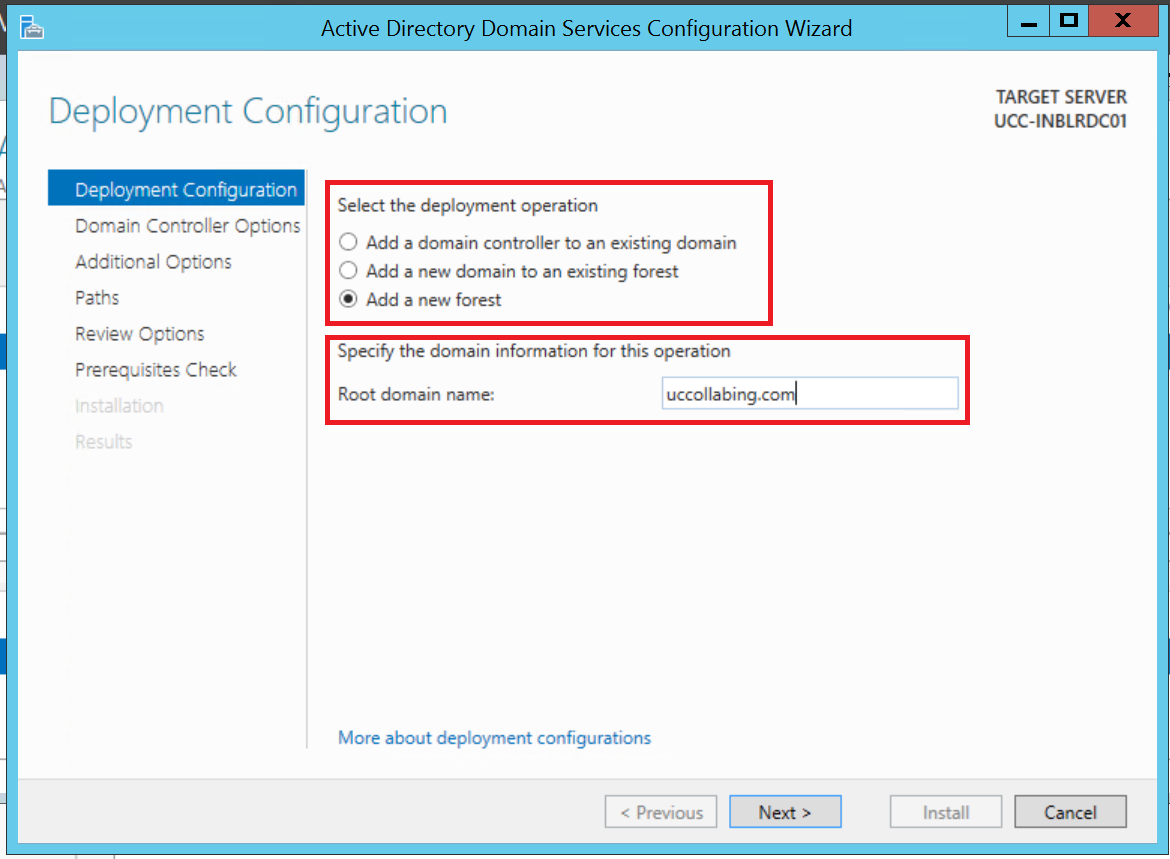
- Radio check “Add a new forest”
- Root domain name : “domain.name” – Enter your domain name. For example: uccollabing.local and click on Next

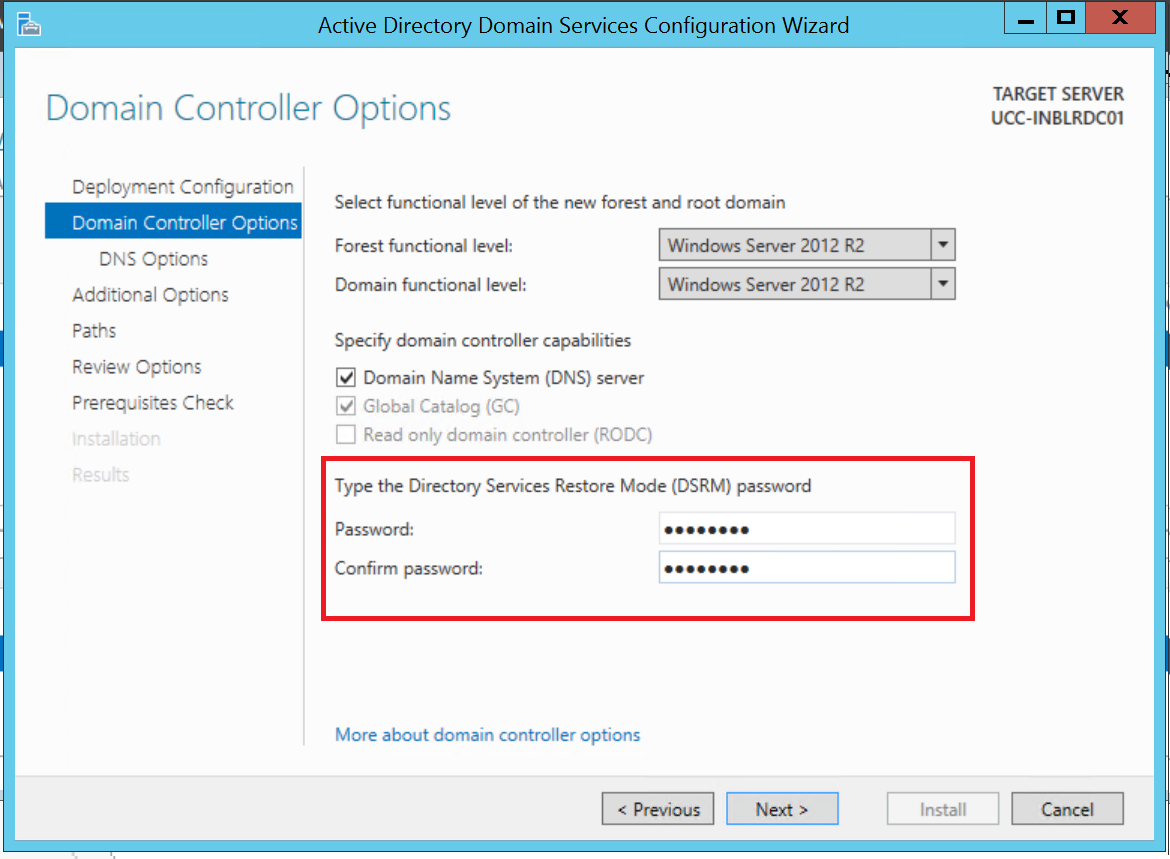
- Enter DSRM (“Directory Services Restore Mode”) password and click on Next

- In the “Specify DNS delegations window”, just click on Next
- In the “NetBIOS domain name” window, just click on Next
- In the “AD DS database” window, just click on Next
- In the “Review your selections” window, just click on Next
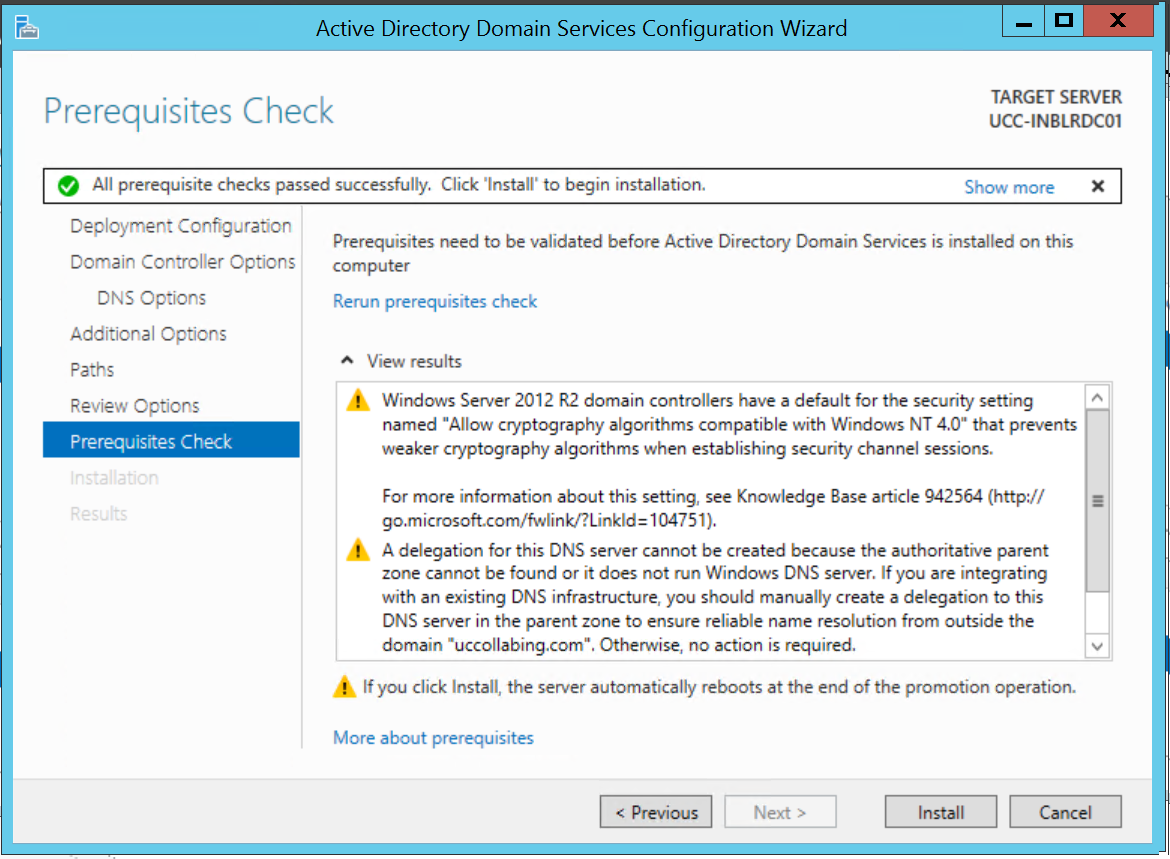
- In the “Prerequisites check” window, just click on Install

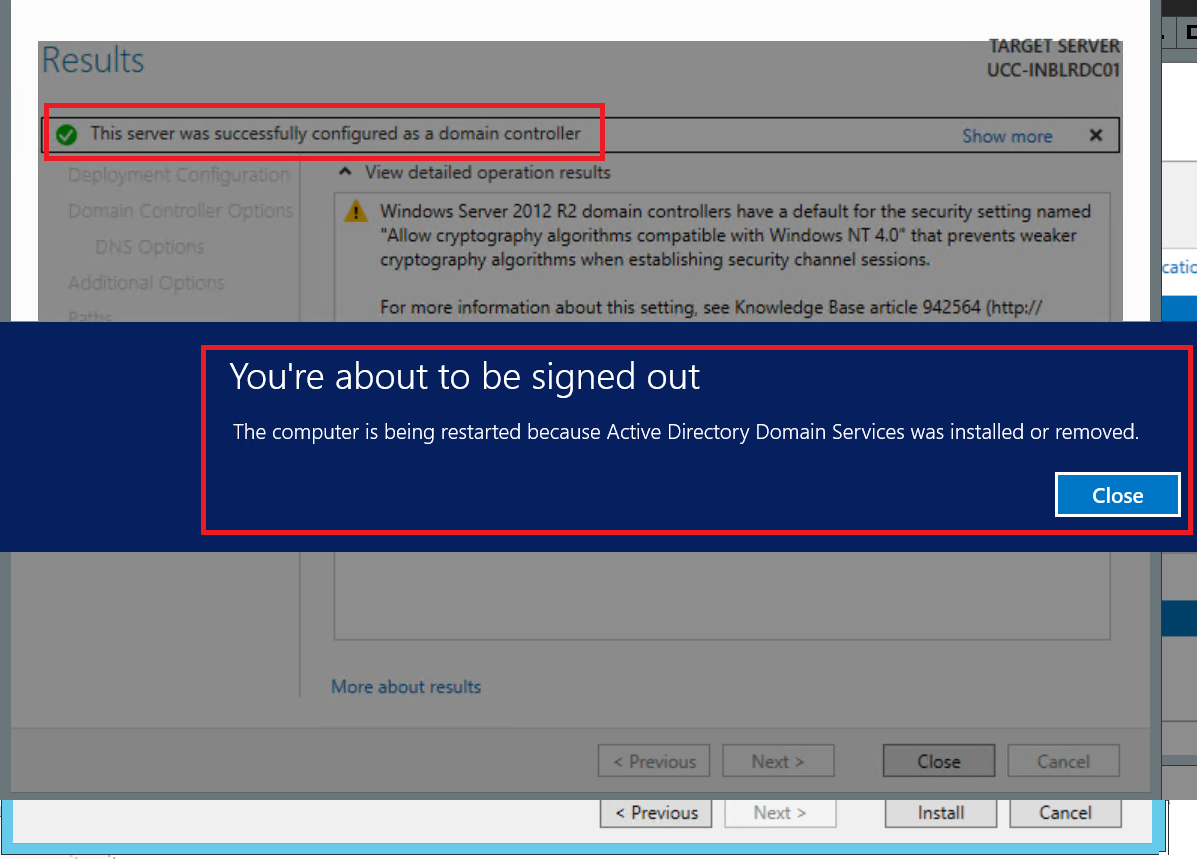
- Once the installation is finished, you will see the result as “This server was successfully configured as a domain controller” and your system will automatically restart.

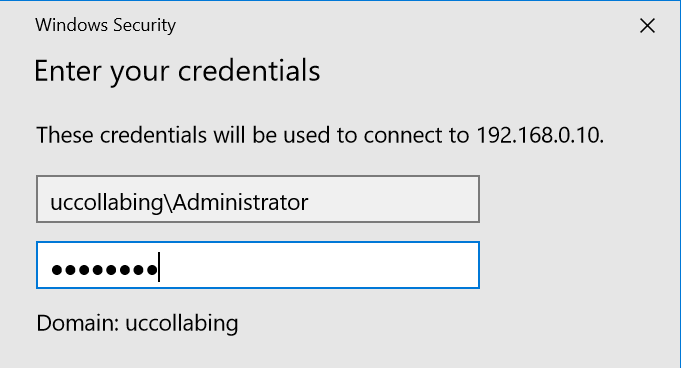
- Once your server comes back online, you need to login to the server using the domain controller username and password”. As per our scenario example, it would be”uccollabing\Administrator” and then the Administrator password.

- Congratulations! Your server is now a Domain Controller. You now need other systems or servers to join this domain.
Joining Computers/Servers to the domain controller network:
- Let us join Lync2013 server with this domain. Login to the Lync server.
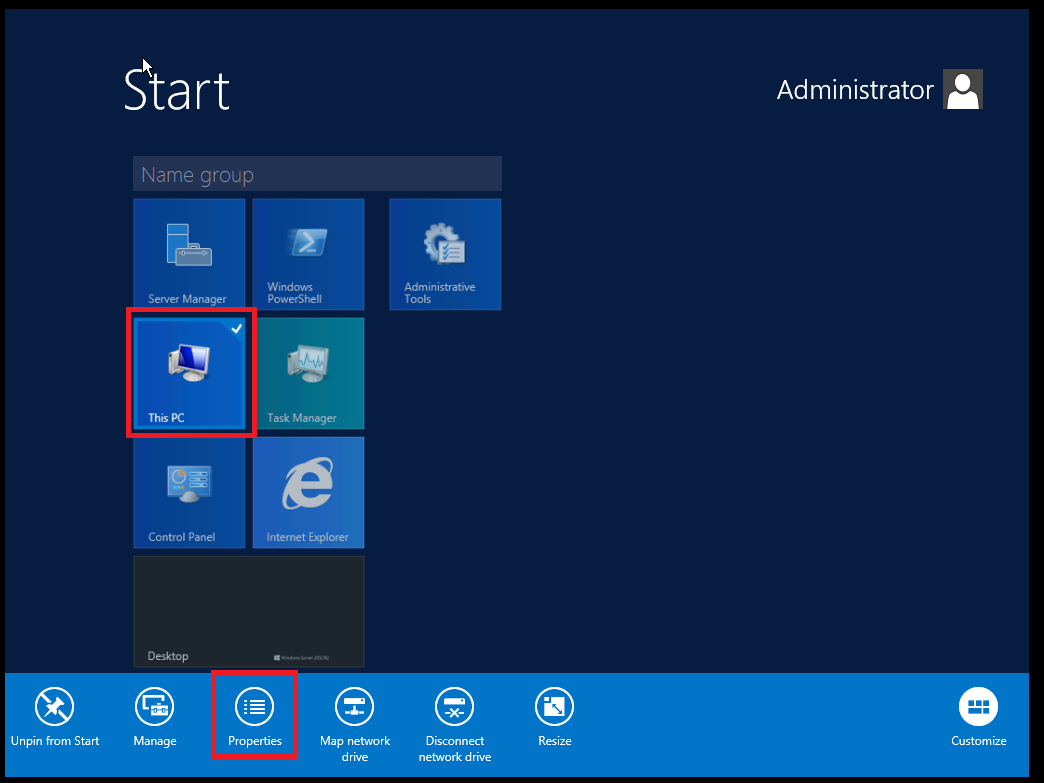
- Click on Start Menu, Right Click “This PC” and click on “Properties”

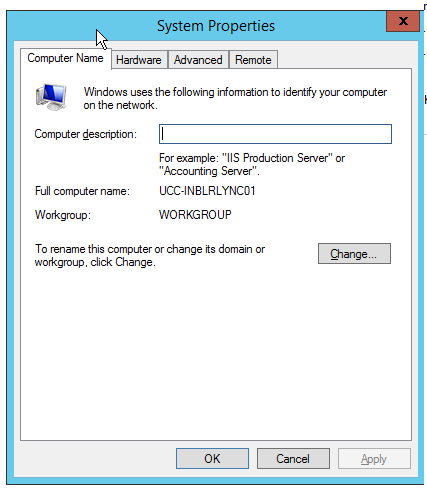
- Click on Change Settings

- Click on Change

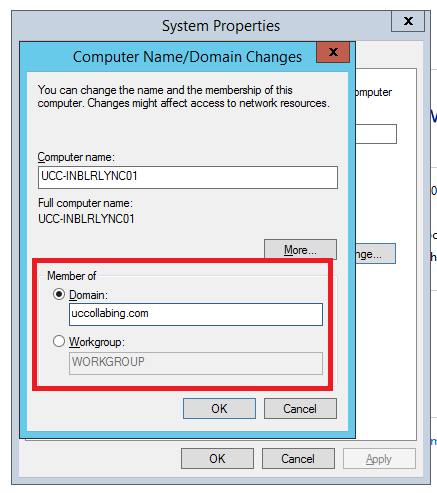
- Under “Member of”, Radio Check “Domain”
- Type the domain name “uccollabing.com” and click on OK

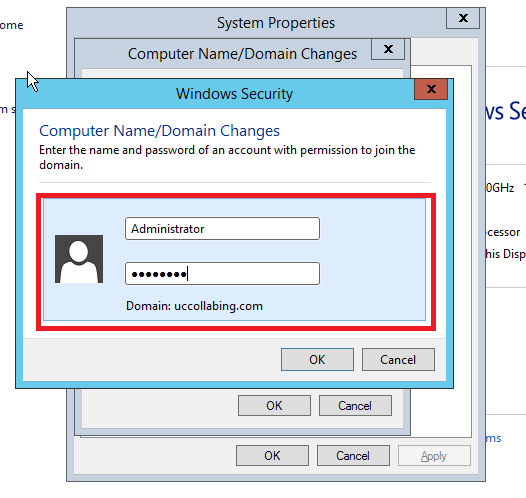
- It will prompt you for “Username and Password”. Enter the domain server username and password and click on OK

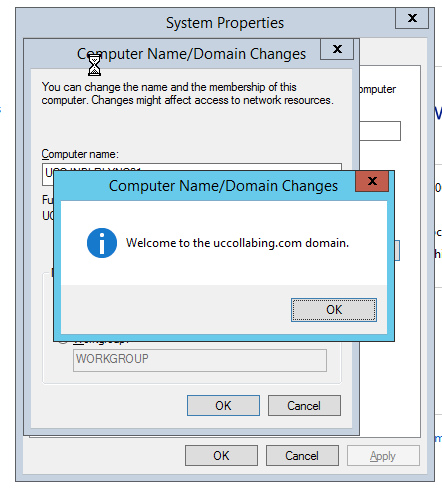
- If successfully authenticated, it will give you a message “Welcome to the uccollabing.com domain.”

- Click on OK
- Click on OK again
- Click on close
- You will be prompted to restart your system, click on restart now.
Congratulations! Your system has joined the domain. Once your system is back online, you can login to your system using the domain username and password.
That’s all! Similarly, you need to follow the same steps from step 1 till step 12 to join other systems/servers in your network.
Go back to – Step by Step Lync Server 2013 Installation & Configuration
Hope this helps!

I am working in an IT company and having 10+ years of experience into Cisco IP Telephony and Contact Center. I have worked on products like CUCM, CUC, UCCX, CME/CUE, IM&P, Voice Gateways, VG224, Gatekeepers, Attendant Console, Expressway, Mediasense, Asterisk, Microsoft Teams, Zoom etc. I am not an expert but i keep exploring whenever and wherever i can and share whatever i know. You can visit my LinkedIn profile by clicking on the icon below.
“Everyone you will ever meet knows something you don’t.” ― Bill Nye



Pingback: Installing Lync 2013 in Lab – Certificate Authority Setup
Pingback: Step by Step Lync Server 2013 Installation & Configuration